File Transfer (WinSCP version)
Last Update: Jan 8, 2026 tested with WinSCP 6.5.5 & minor fixes % remove md5 keys
Installation of WinSCP
You can download WinSCP installer at https://winscp.net. Please follow the instructions in the installer.
If you don't have SSH keys, please generate ones first. There are some guides in Quick Start Guide page.
How To
1. Launch WinSCP and Begin Setup
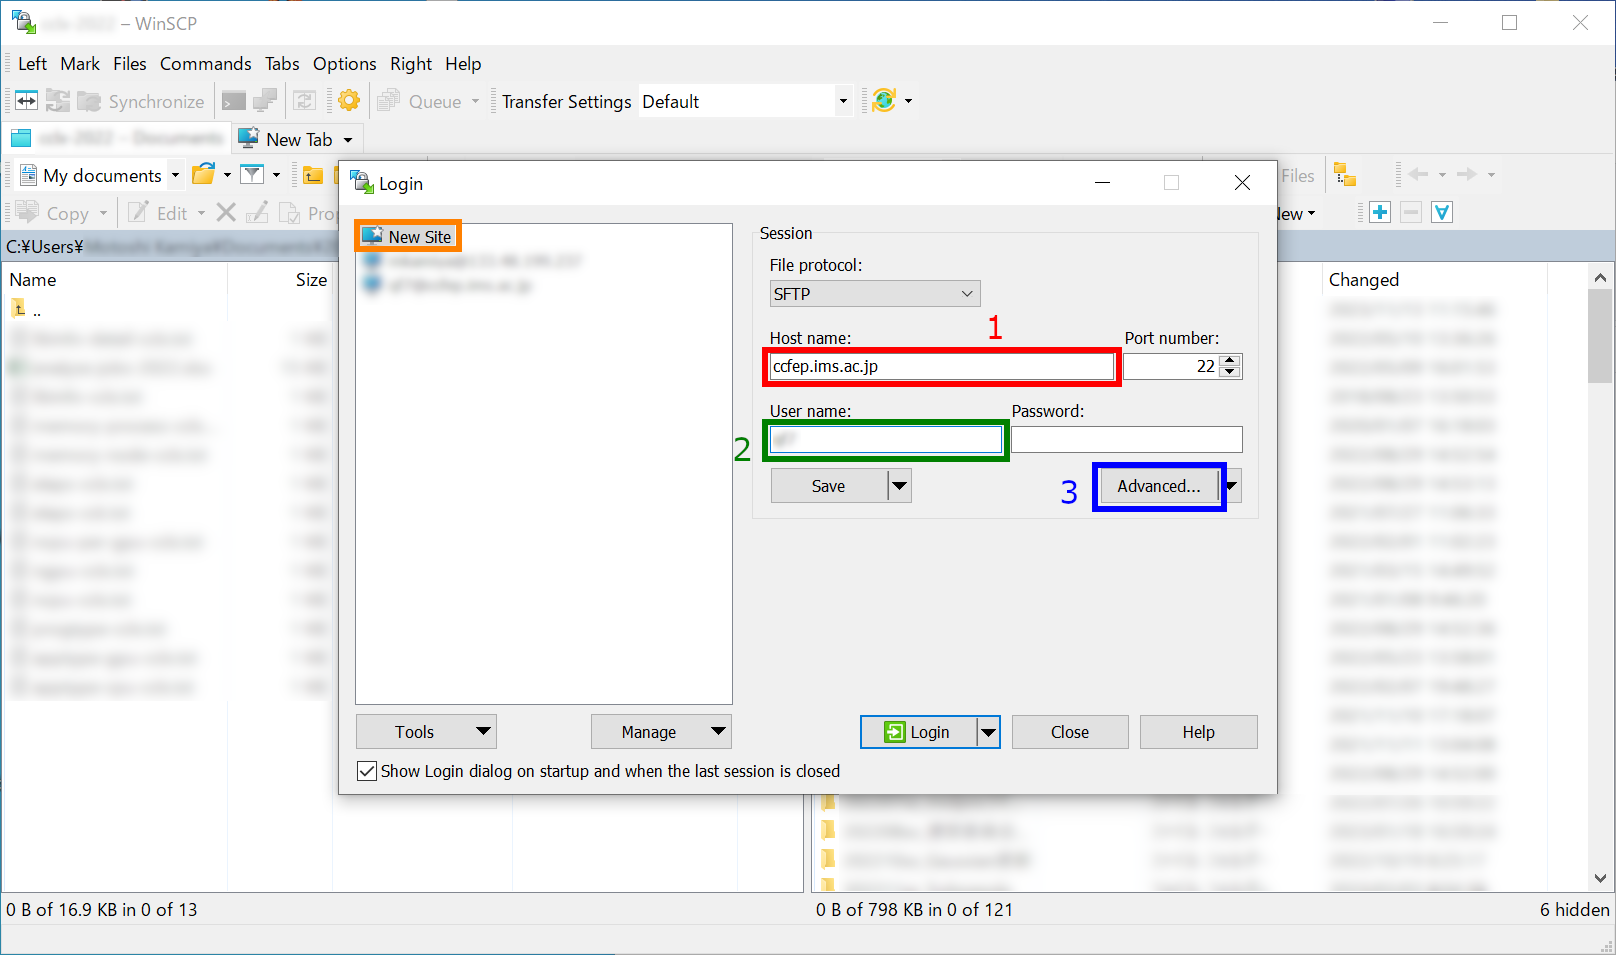
Launch WinSCP and begin configuration as a "New Site".
1. input ccfep.ims.ac.jp in Host name box
2. input RCCS user name here (3 letter ID)
3. Click Advanced... button for private key setting
2. Specify Private Key
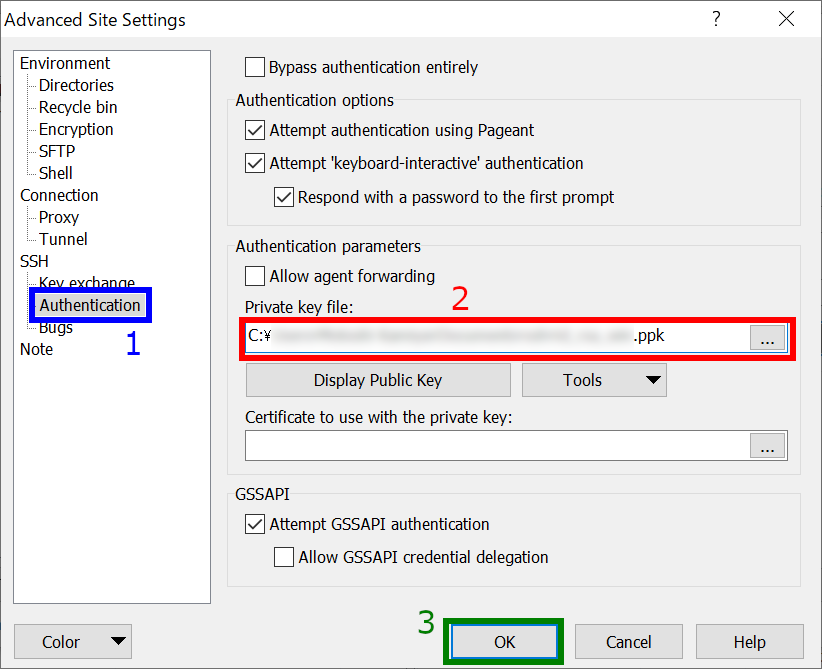
In the "Advanced Site Settings" window, select "Authentication" item inside "SSH" menu, and then specify private key file. WinSCP can use only PuTTY format keys (.ppk). However, you can choose OpenSSH (including Tera Term) key here; WinSCP will offer you to convert it to PuTTY format. After the private key setup, click "OK" to go back to the initial window.
3. Save Config and Begin Connection
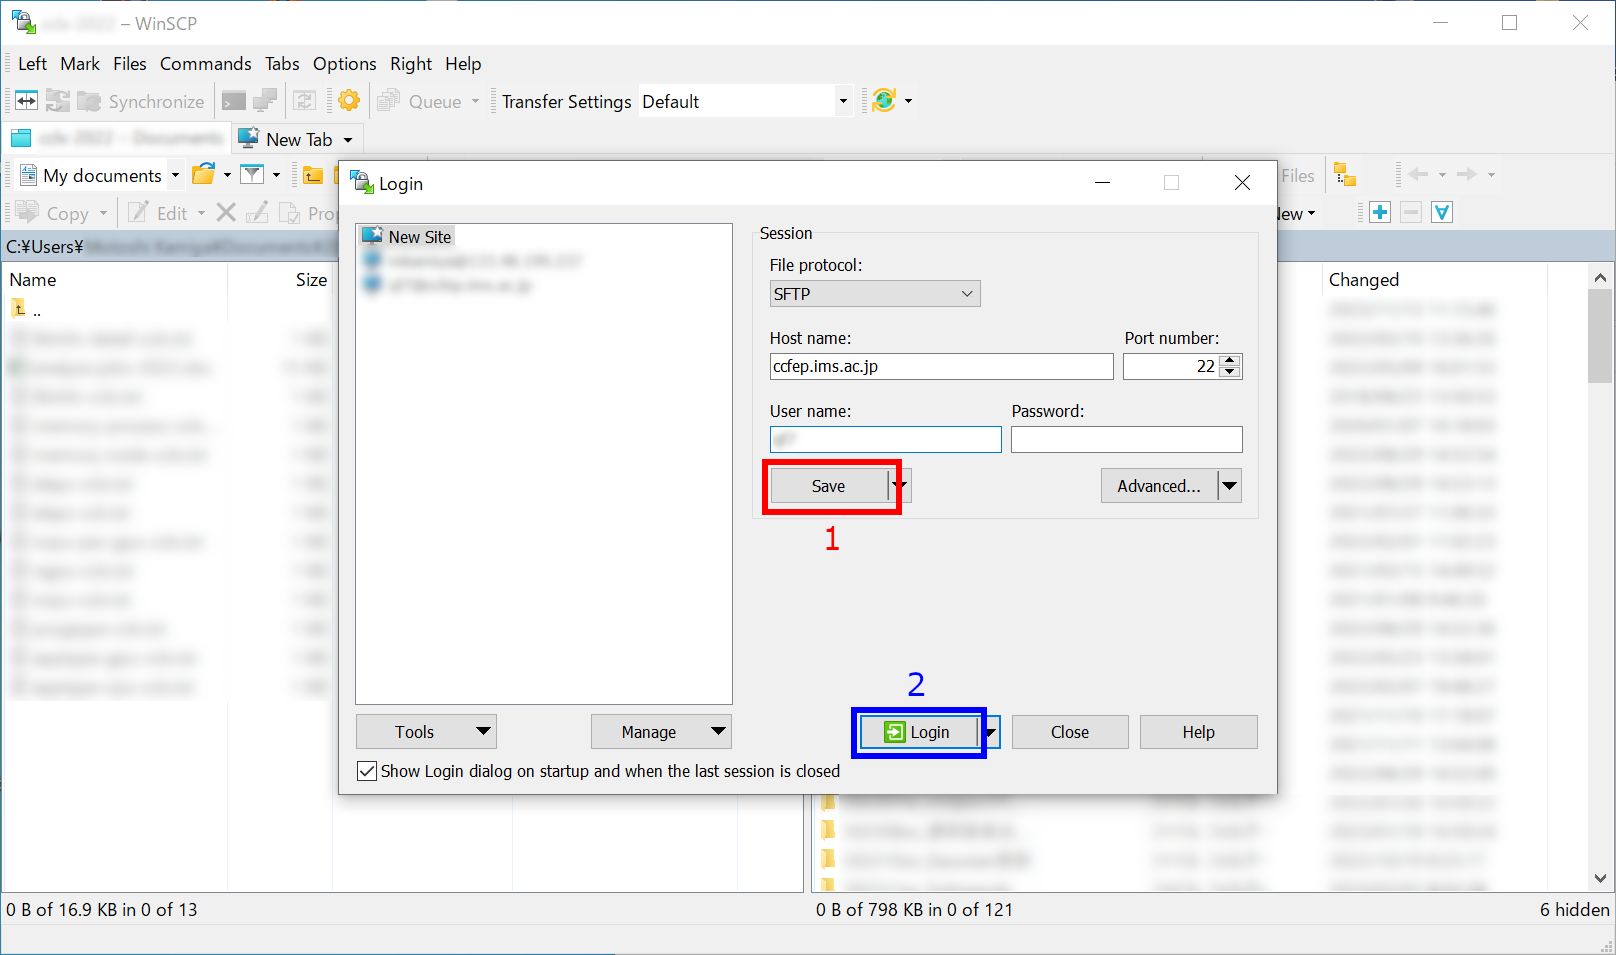
At this point, you can begin connection to the frontend server. However, we recommend you to save configuration here. Then, click "Login" to begin connection.
4. Security Warning upon first Connection
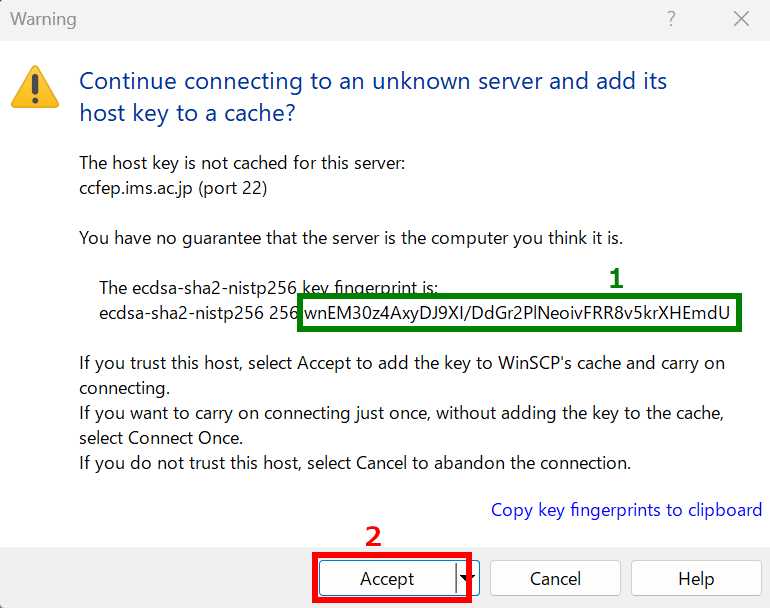
You may see warning window like above upon first connection. You need to verify the fingerprint of the server. The fingerprint must match either one in the following list. Then, click "Accept" to continue.
- wnEM30z4AxyDJ9XI/DdGr2PlNeoivFRR8v5krXHEmdU (SHA256)
- 0KL38Yn/kBee1pAuxyKwenEwXjtPxr9ZElolfVqXvbI (SHA256)
- Nhg+9Lgj3XeuW//A/j7jqgUJlIxWehryCtStIp1Dir (SHA256)
5. Input Passphrase of Private Key
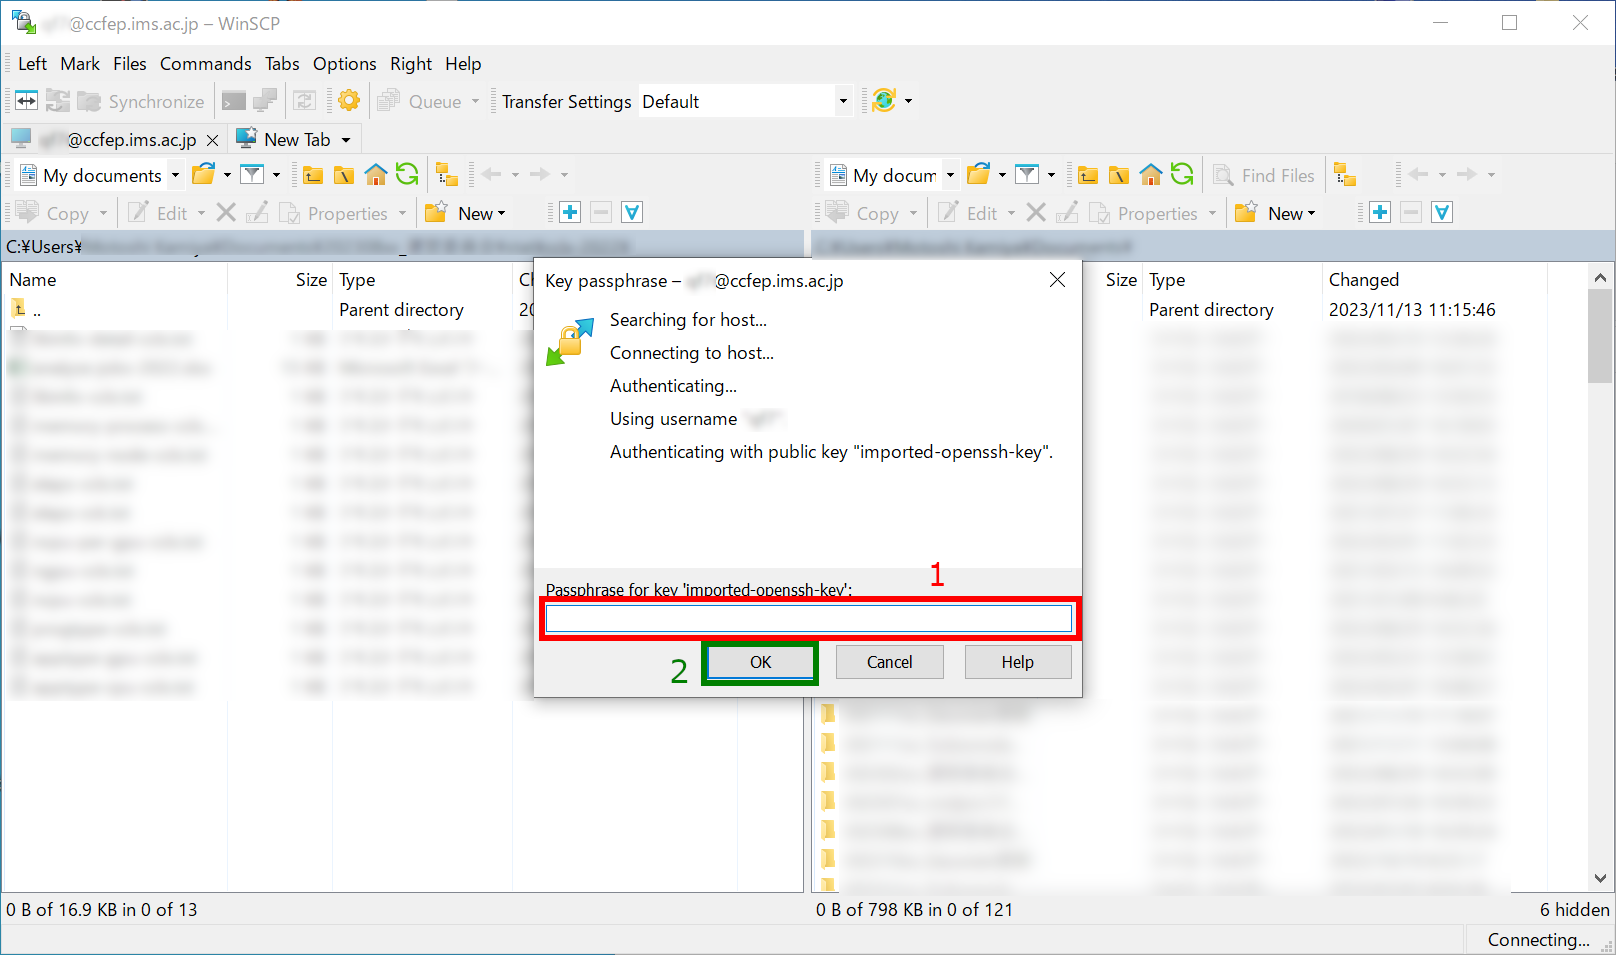
Input passphrase of private key and then click OK. (If you are using Pageant and the key is registered correctly, this skip may be skipped.)
6. Completed!

If everything works fine, you will successfully logging in to the frontend node.
If you failed to logging in, please update your WinSCP to the latest version and retry.
Please contact us if the update of WinSCP doesn't solve the problem.