SSH Key Generation and Login (PuTTY version)
Last update: Jun 12, 2026, tested with PuTTY 0.84 & add anchor links.
Introduction
The aim of this page is to explain how to login to RCSS supercomputer using PuTTY and PuTTYgen.
- Install PuTTY
- SSH key generation (PuTTYgen)
- Register Public Key (Common) => How to set your password and put your public key
- Login (PuTTY)
Install PuTTY
You can download PuTTY at its official site (https://www.chiark.greenend.org.uk/~sgtatham/putty/). MSI installer version of the latest stable release available in this page maybe the most standard way to install PuTTY. (The official website will move to https://putty.software in the future.)
If you already have PuTTY but not PuTTYgen, you can install PuTTYgen (puttygen.exe) from the "Alternative binary files" section of the download page.
SSH key generation (PuTTYgen)
Launch PuTTYgen
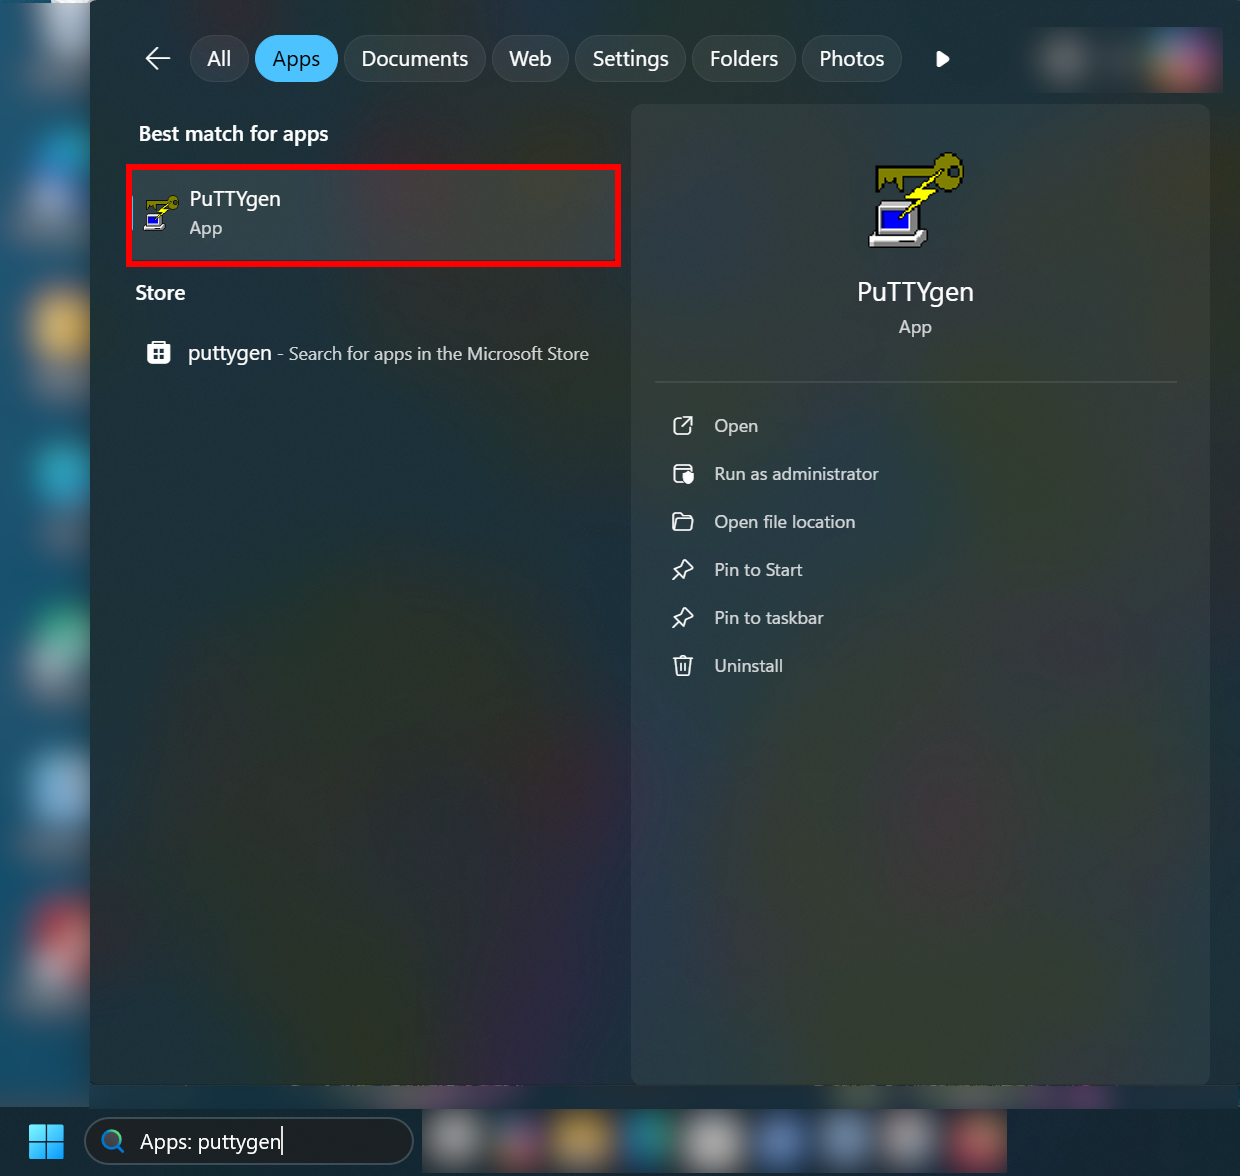
PuTTYgen can be found by using search box (Windows Search).
Key generation (1) - Key type
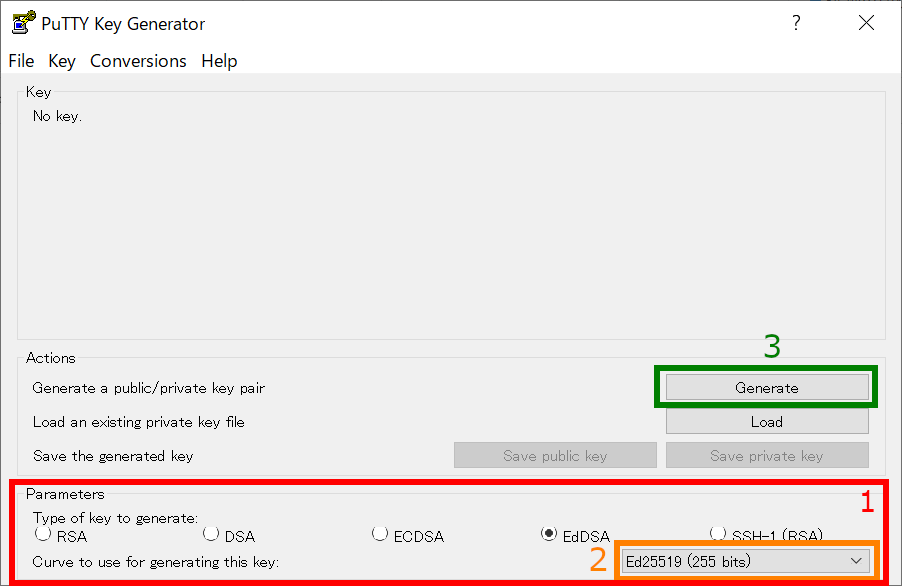
You may see PuTTYgen window like above.
1. Choose Key Type
Ed25519, ECDSA (256, 384 bits), and RSA 4096 bits of keys are recommended in RCCS. Please choose Ed25519 if you have no preference.
Notices
- Ed448 is not yet available at RCCS login servers. Please don't choose Ed448.
- ECDSA 521 bits keys are disabled due to the issue on PuTTY 0.68-0.80.
- To use RSA keys, PuTTY 0.75 or later is required.
2. Choose Key Length (ECDSA or RSA case)
In case of ECDSA or RSA type, you may find optional item at the position specified by "2". Please choose/input value there.
3. Start Generation of Key
Once you click the "Generate" button, the key generation will begin. You need to move mouse cursor around to proceed the key generation after clicking this button.
Key generation(2) - Set passphrase, then save the keys
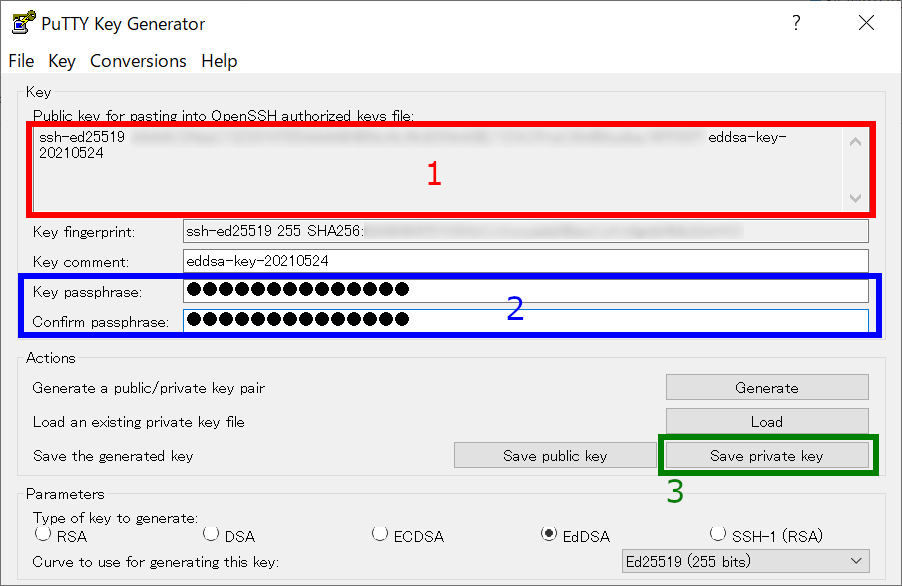
Once the key generation completed, the appearance of the window will change like above.
1. OpenSSH type public key
The public key shown as a string in this field is what we need. Extract all the contents in this filed into notepad or others, and then save it! (Do not miss ssh-/ecdsa- part in the beginning!) Note: you don't need public key from "Save public key" button; we need only OpenSSH format one.
You can rebuild public keys via "Load" button or "Conversion" menu if you still have private key. (If you lost the private key, you need to generate a new key.)
2. Set passphrase for private key
You can set passphrase for private key here. We, RCCS, recommend passphrase of 10 or more characters contaning 4 types of characters - "lower-case", "upper-case", "number", and "symbol".
3. Save the private key
After setting passphrase, click "Save private key" button to save the key. Easy-to-understand name such as "rccs.ppk" or "ccfep.ppk" may be a good choice. (NOTE: THE PRIVATE KEY FILE MUST BE KEPT SECRET!)
Register Public Key (Common)
You need to register the public key before login. Please register your public key according to the instructions in https://ccportal.ims.ac.jp/en/account.
Please note that the public key you need is an OpenSSH type one (see above), not the one from "Save public key" button.
Login (PuTTY)
Launch PuTTY and set destination
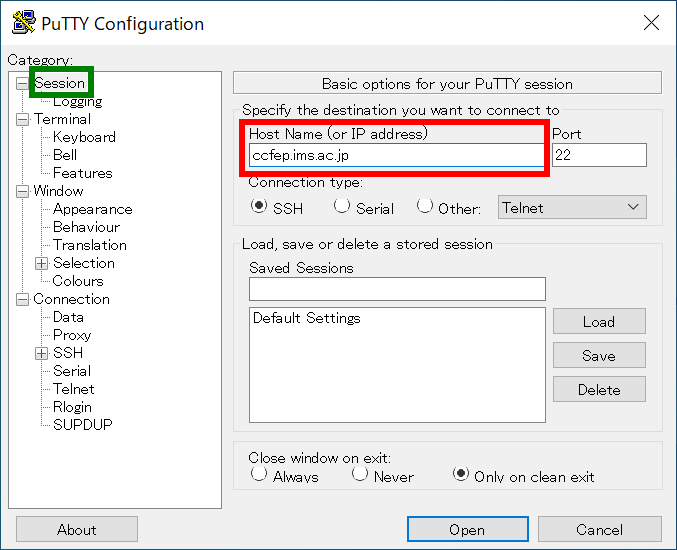
Launch PuTTY, input ccfep.ims.ac.jp in "Host Name (or IP address)" text box. (Do not push "Open" now!)
Specify user name
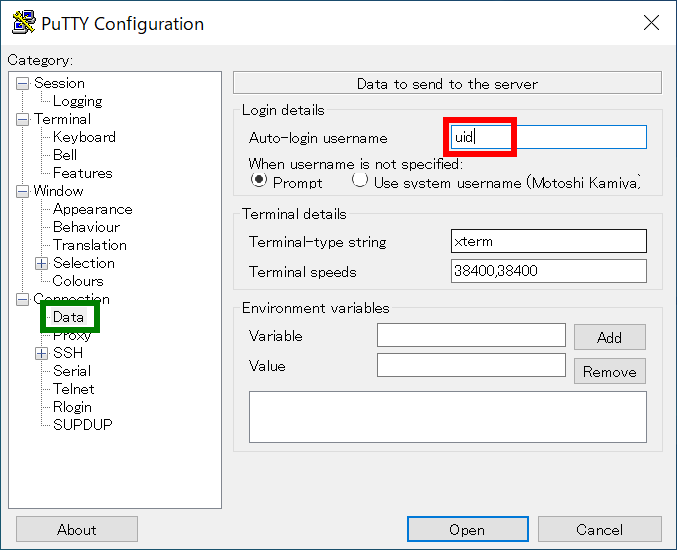
Move to "Data" in "Connection" item. You can set username in "Auto-login username" textbox. Please input RCCS user id (three-letter ID given by RCCS).
You can skip this step. You need to input username upon authentication in this case.
Specify Private Key File
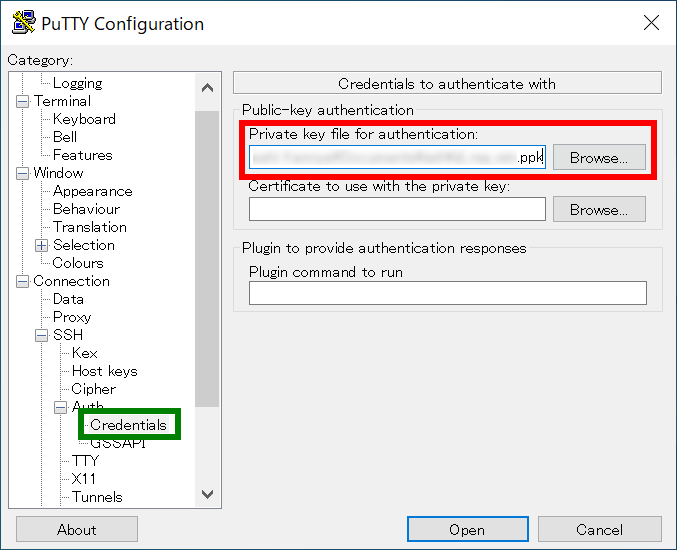
Move to "Credentials" menu item in "Connection"=>"SSH"=>"Auth". Then, click "Browse" button and choose the generated private key file (.ppk).
If "Credentials" menu item does not exist, the private key file field may be found in "Connection"=>"SSH"=>"Auth" menu item.
Save Configuration
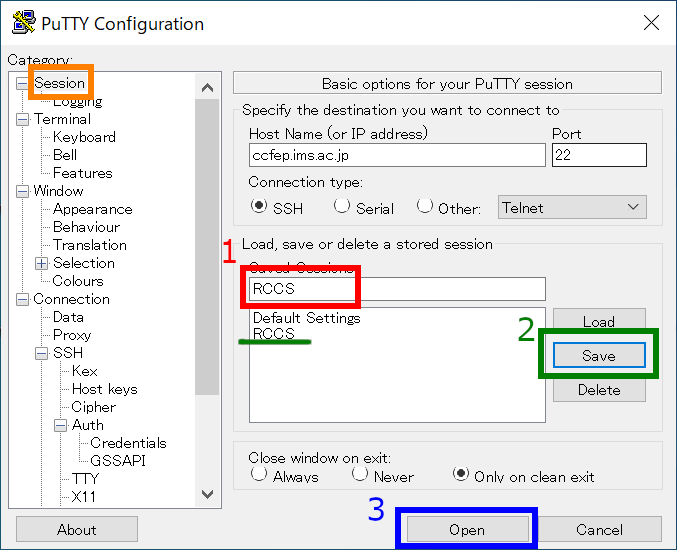
Although you can connect to RCCS servers by clicking "Open" button, you should save the configuration before trying to connect.
Move back to "Session", and give a name to this connection in textbox ("1"), then click "Save" button to save it ("2").
The saved connection name would appear in the list. Finally, click "Open" to begin connection.
The second and subsequent connections can be completed without changing the settings by loading the saved settings. In the case of the window above, click “RCCS” in the larger box (underlined with green), then click the “Load” button, and then click the “Open” button.
Alert message upon first connection
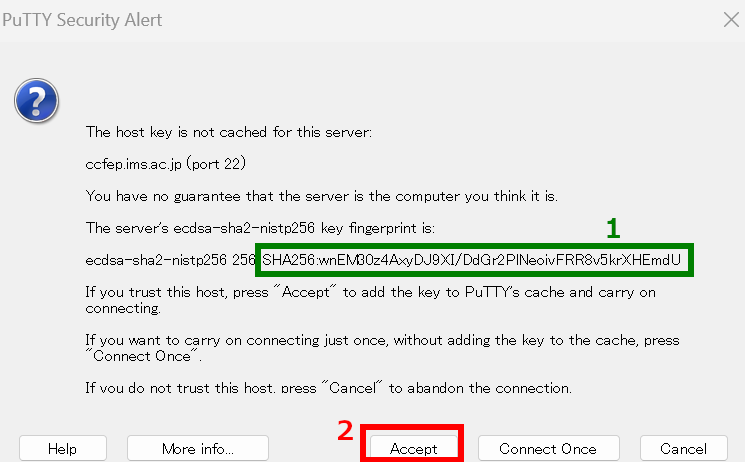
Dialog like above would be shown upon first connection. Please check the fingerprint (1); this must match with either of the fingerprint listed below.
- wnEM30z4AxyDJ9XI/DdGr2PlNeoivFRR8v5krXHEmdU (SHA256)
- 0KL38Yn/kBee1pAuxyKwenEwXjtPxr9ZElolfVqXvbI (SHA256)
- Nhg+9Lgj3XeuW//A/j7jqgUJlIxWehryCtStIp1Dir (SHA256)
Click Ok button if the fingerprint is a valid one.
Input passphrase of private key
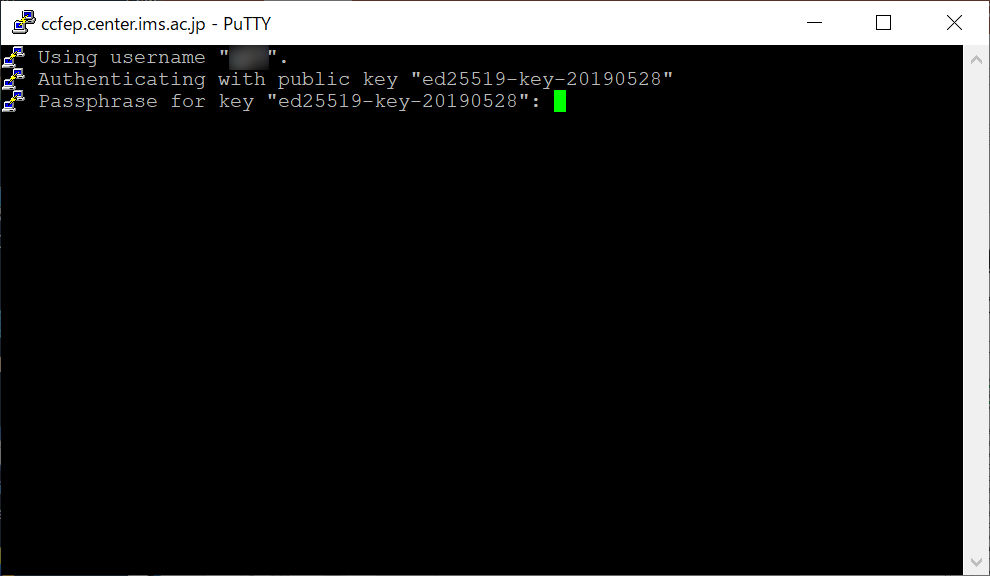
Window like above would be shown if connection to server is succeeded. You then need to input passphrase to use your private key.
(Note: if you register the key to Pageant beforehand, you are able to skip this step.)
Login Completed!
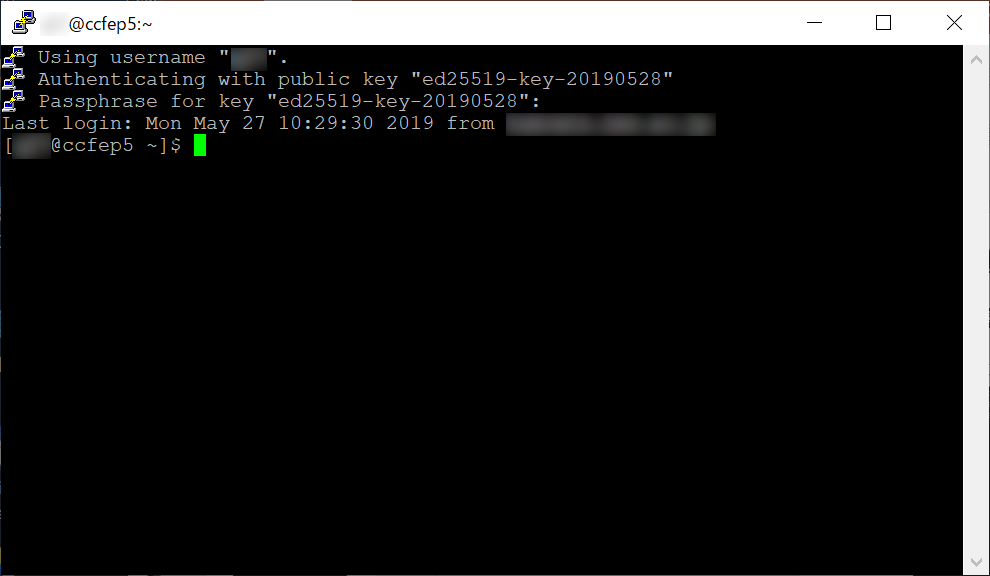
If your key settings are OK, you can login to our login server like above.